This page explains the configuration of Cambium wireless access points for external Captive Portal and RADIUS server authentication using cnMaestro REST API.
IronWiFi Console Configuration
- Log into the IronWiFi console or register for free
- Create a new network
- After that, create a new captive portal, with vendor Cambium cnMaestro
Access Point Configuration
Log in to the Cambium Networks cnMaestro web interface.
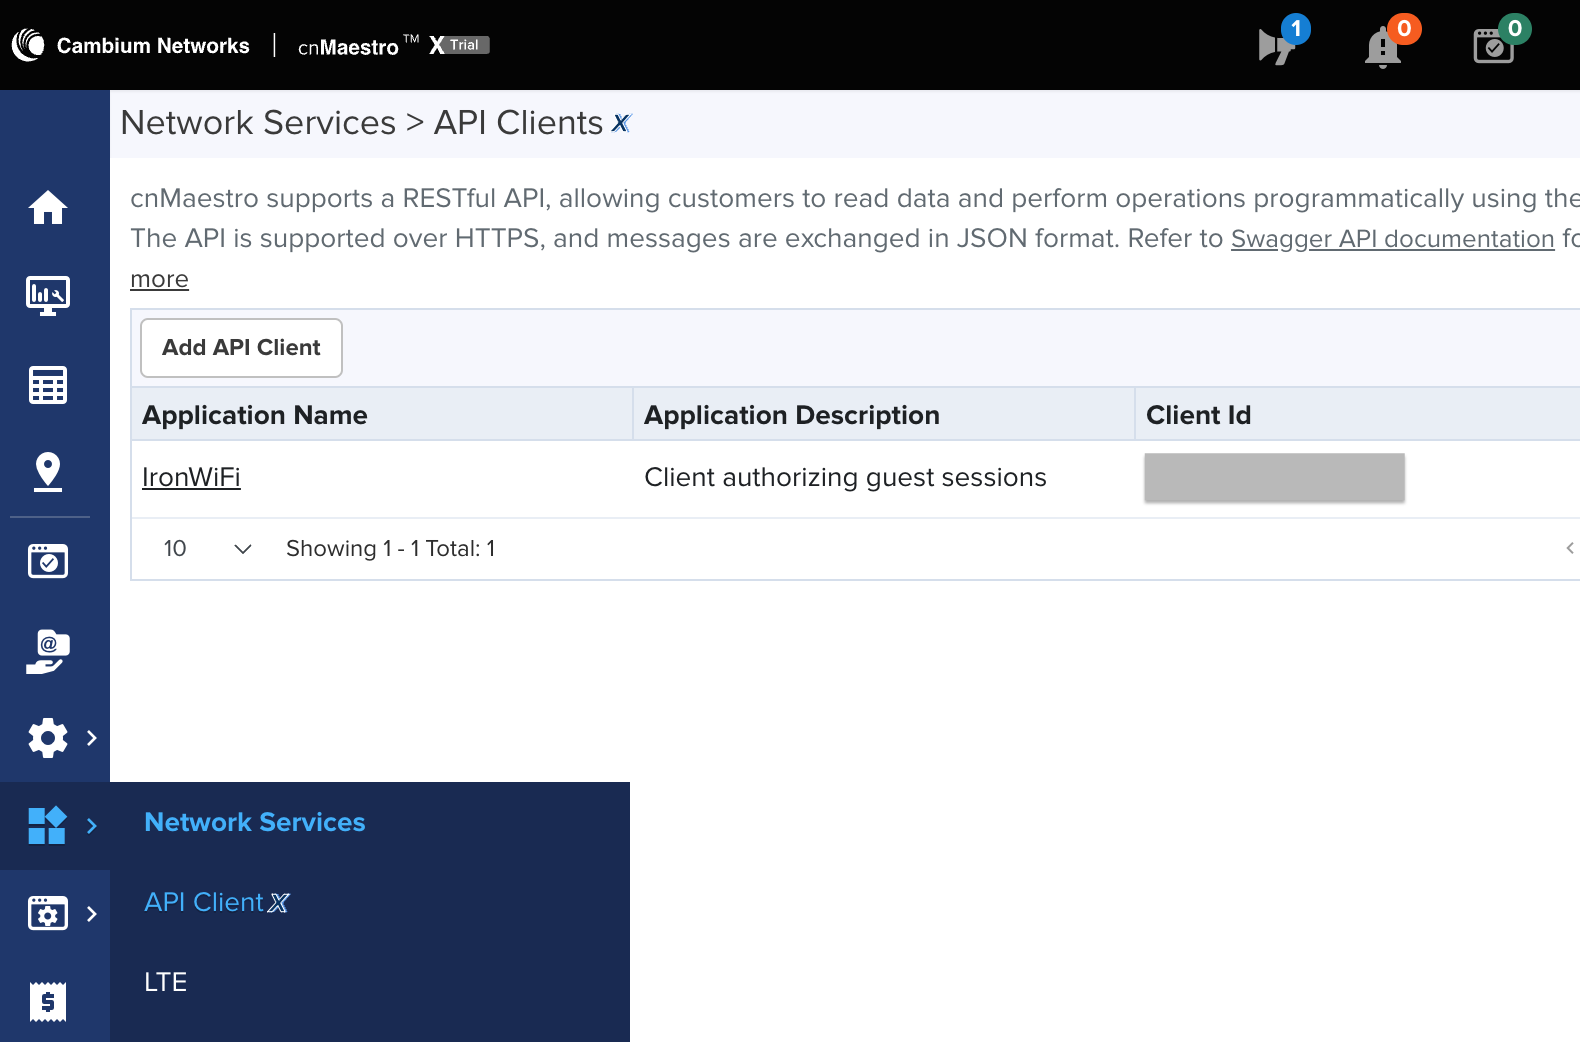
- Navigate to Network Services > API Clients and click Add API Client, configure with the following values.
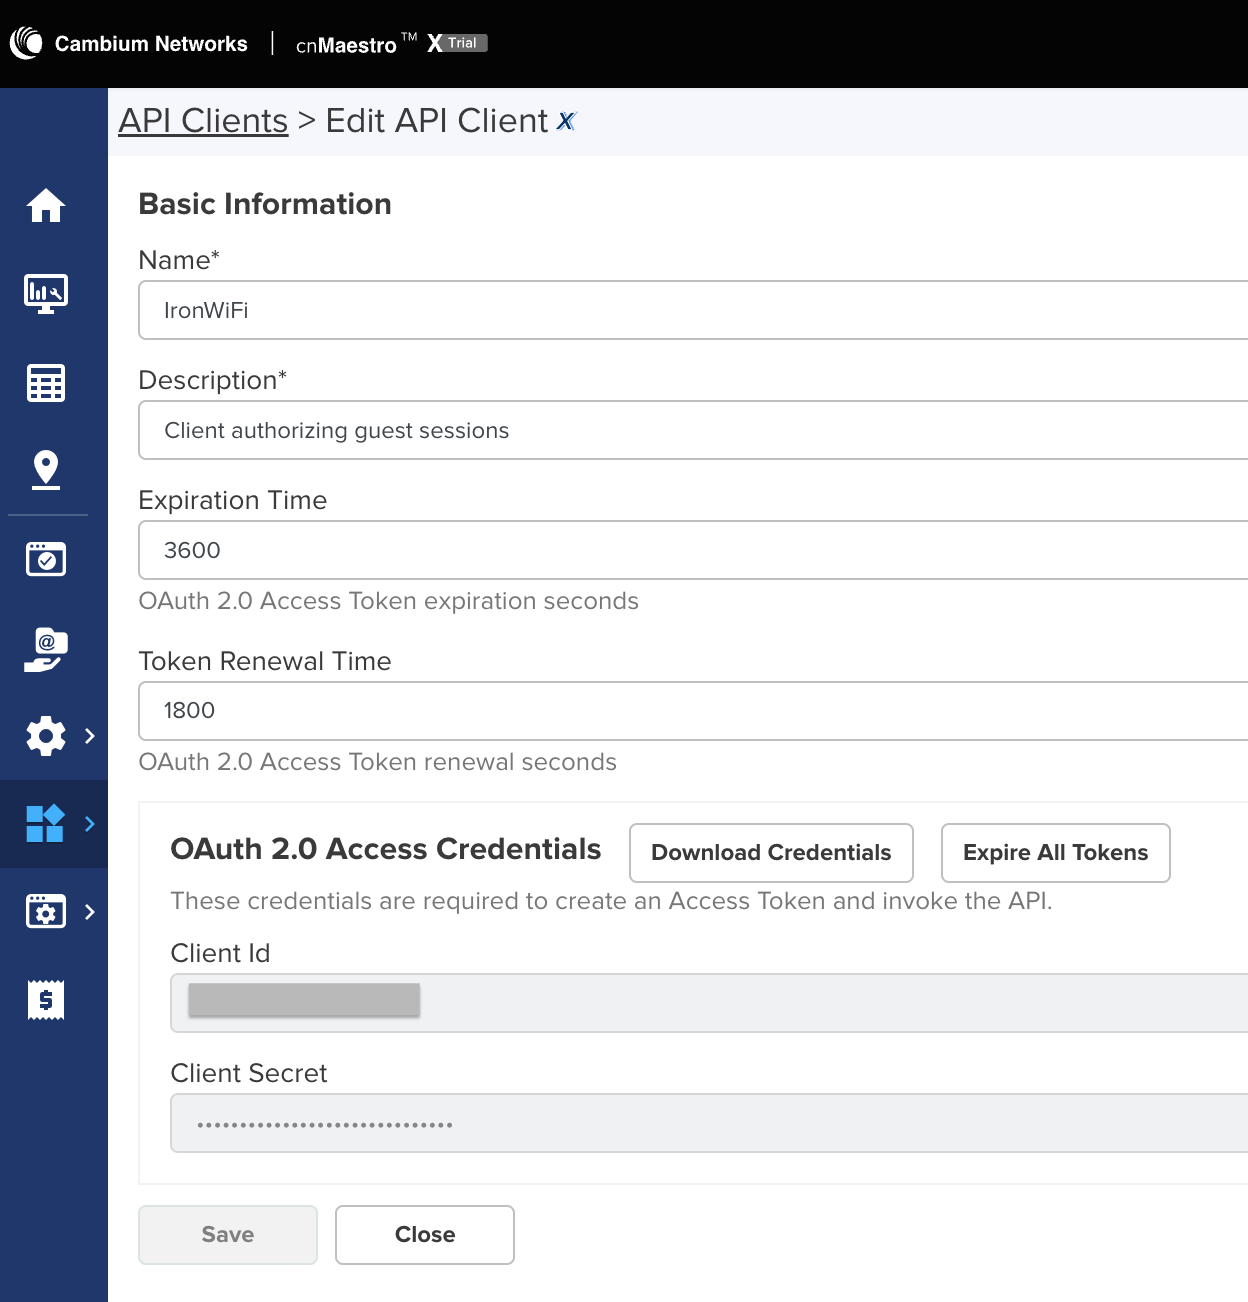
- Name - IronWiFi
- Description - Client authorizing guest sessions
- Expiration Time - 3600
- Token Renewal Time - 1800
Do not forget to copy the client ID and client secret, these values need to be added in your captive portal settings.
- Controller username = Client ID
- Controller password = Client secret
- Controller URL = this is the hostname of your controller when you're logged in to cnmaestro
Click save to continue.
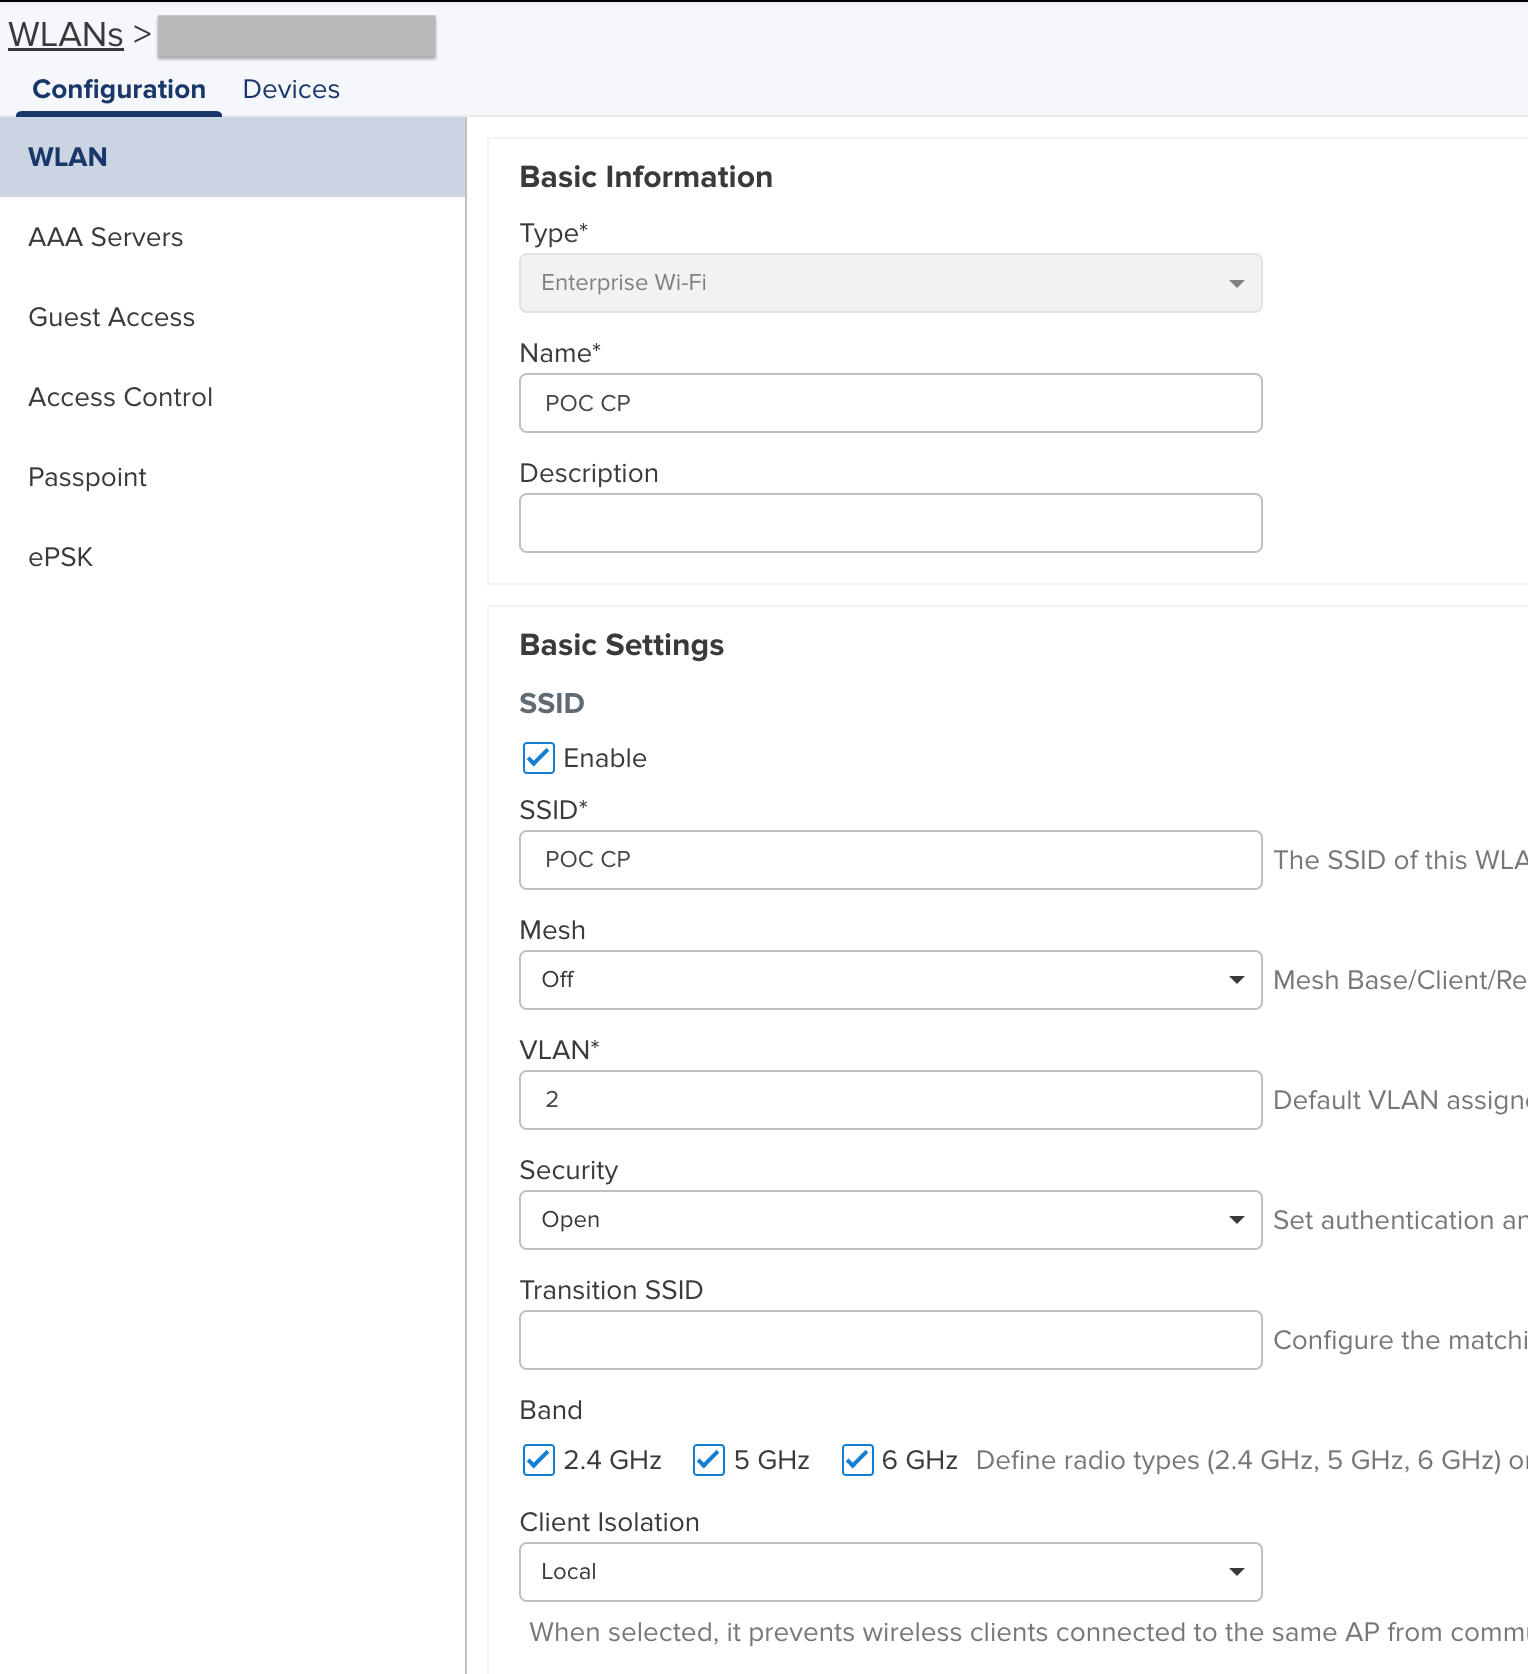
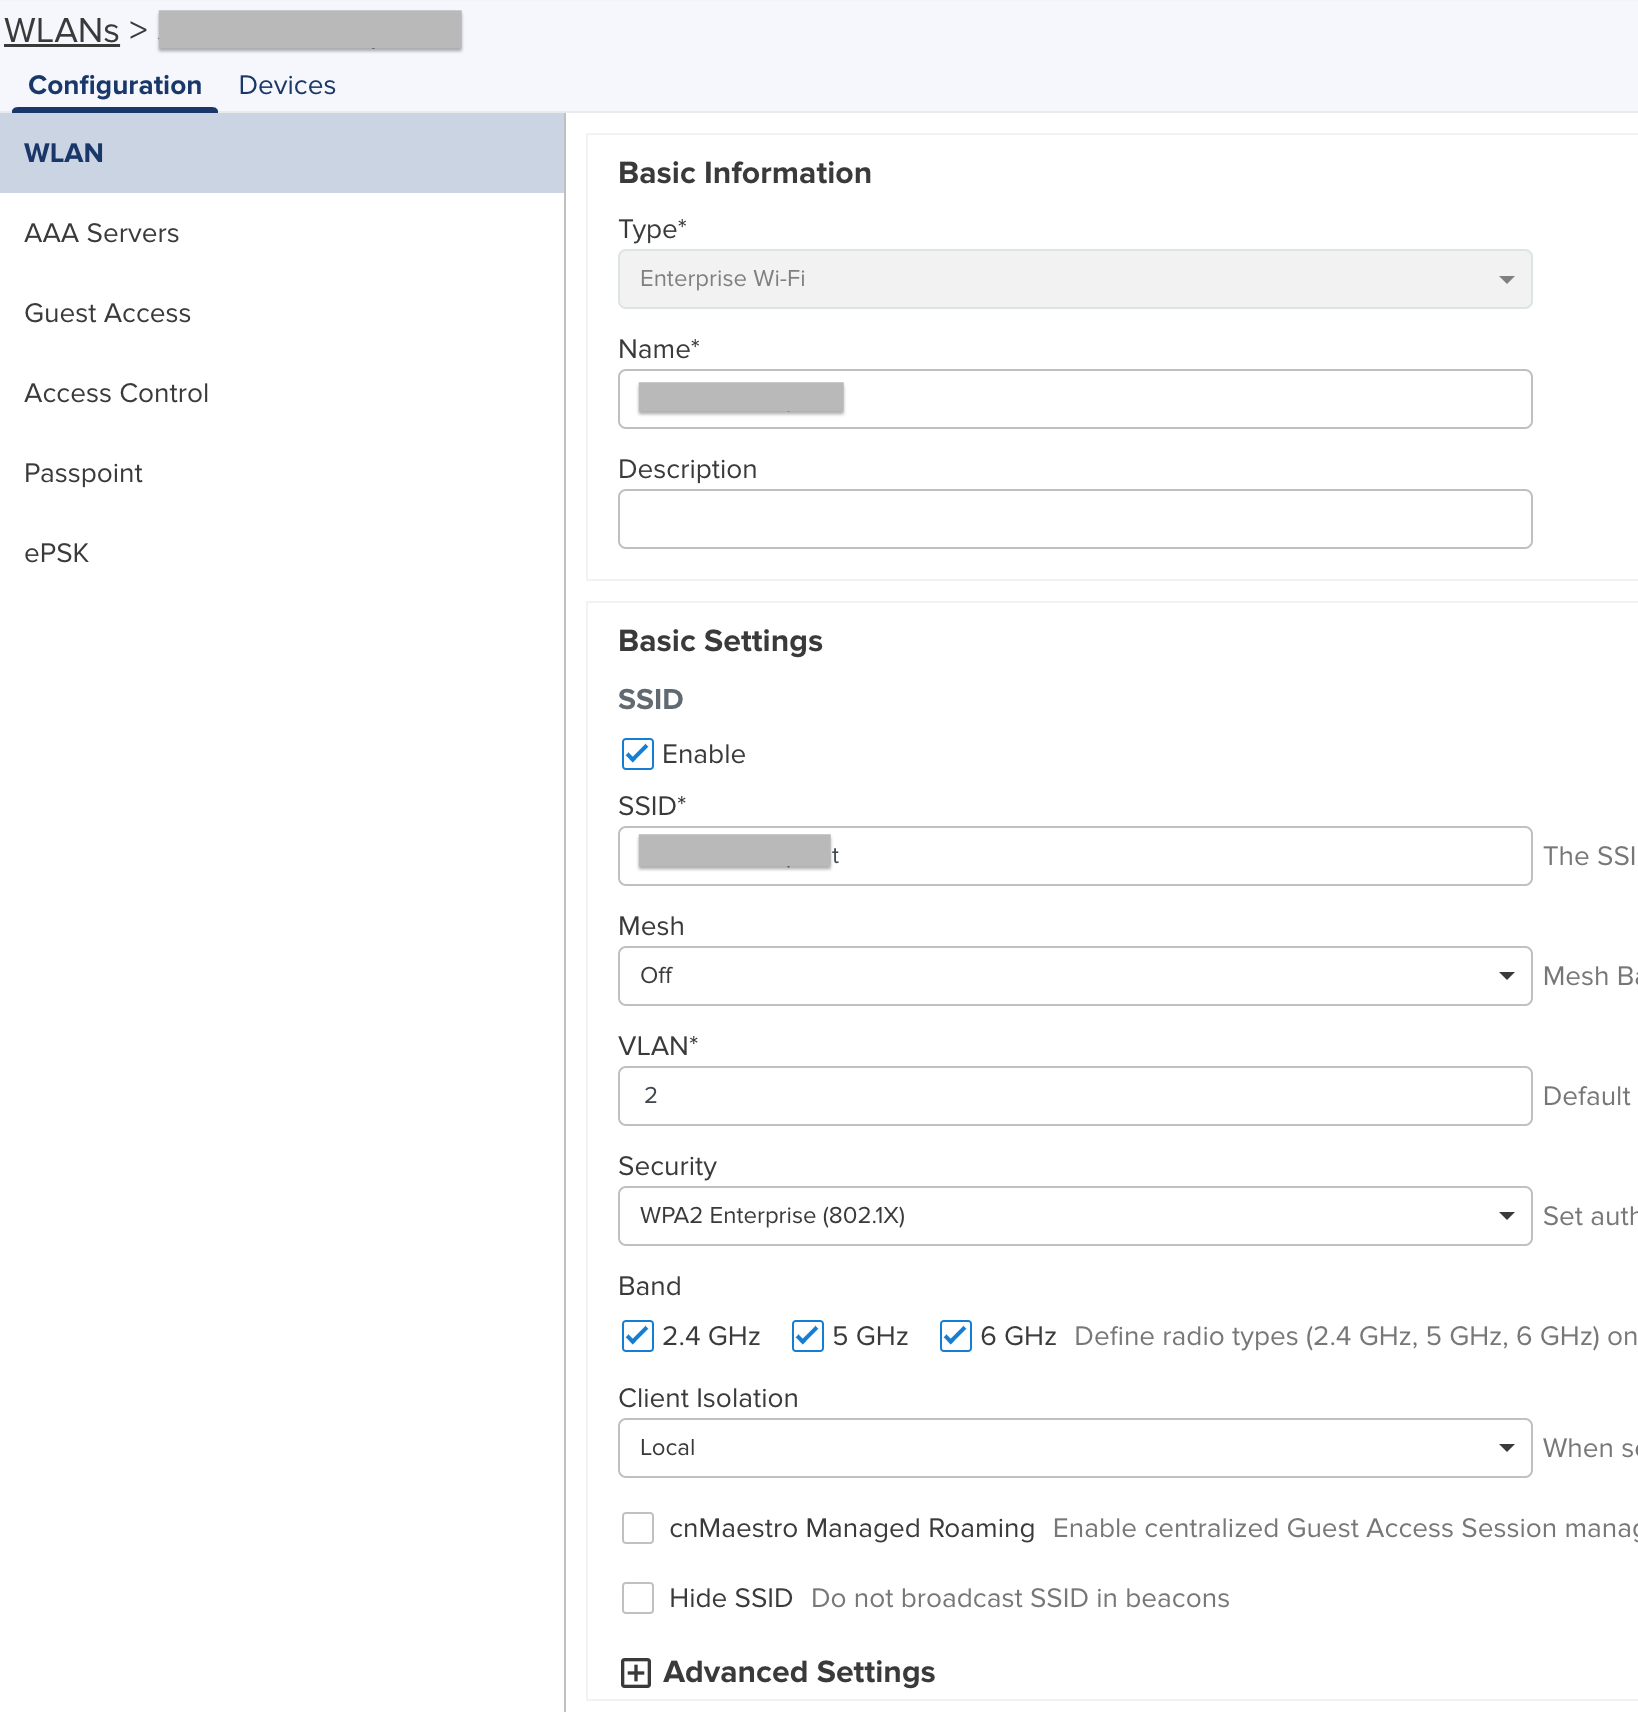
- Navigate to WLANs > Your WLAN and configure as follows.
- Type - Enterprise Wi-Fi
- Name - POC CP (or whatever you wish)
- Description - empty (or whatever you wish)
- SSID - Enabled
- Mesh - Off
- VLAN - 2
- Security - Open
- Transition SSID - empty
- Band - 2.4GHz, 5GHz, 6GHz
- Client Isolation - Local
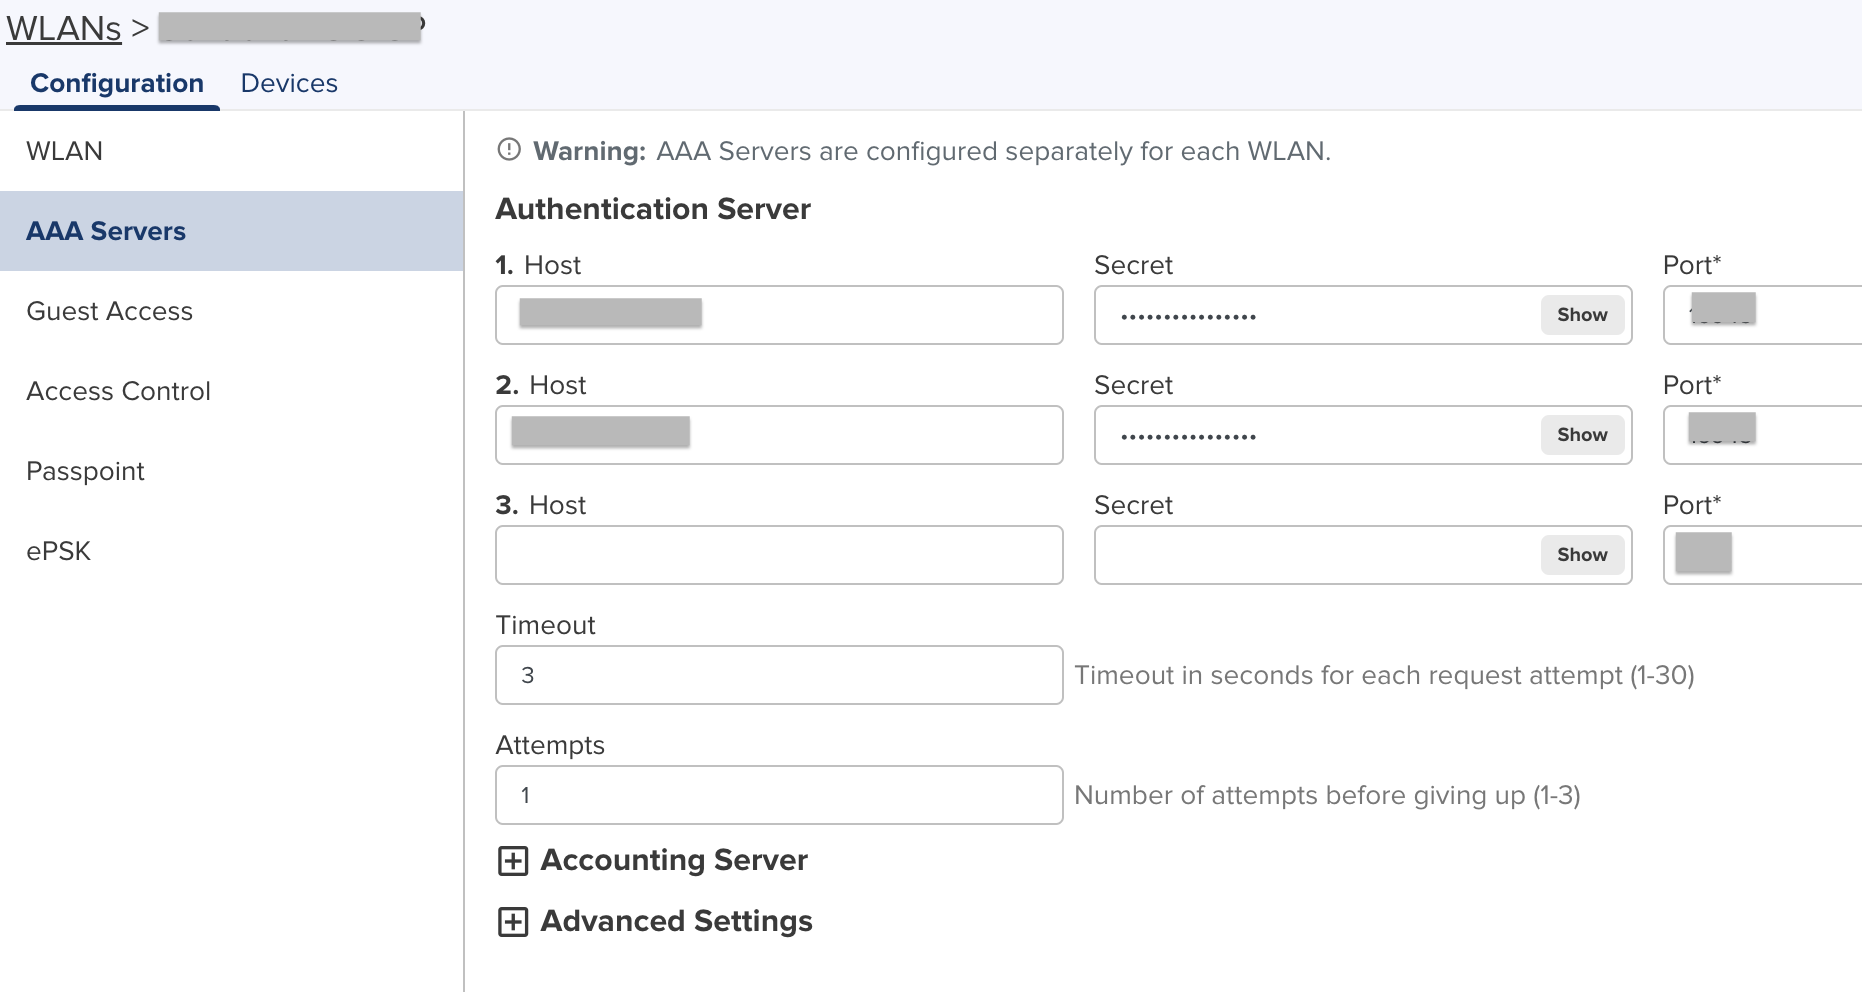
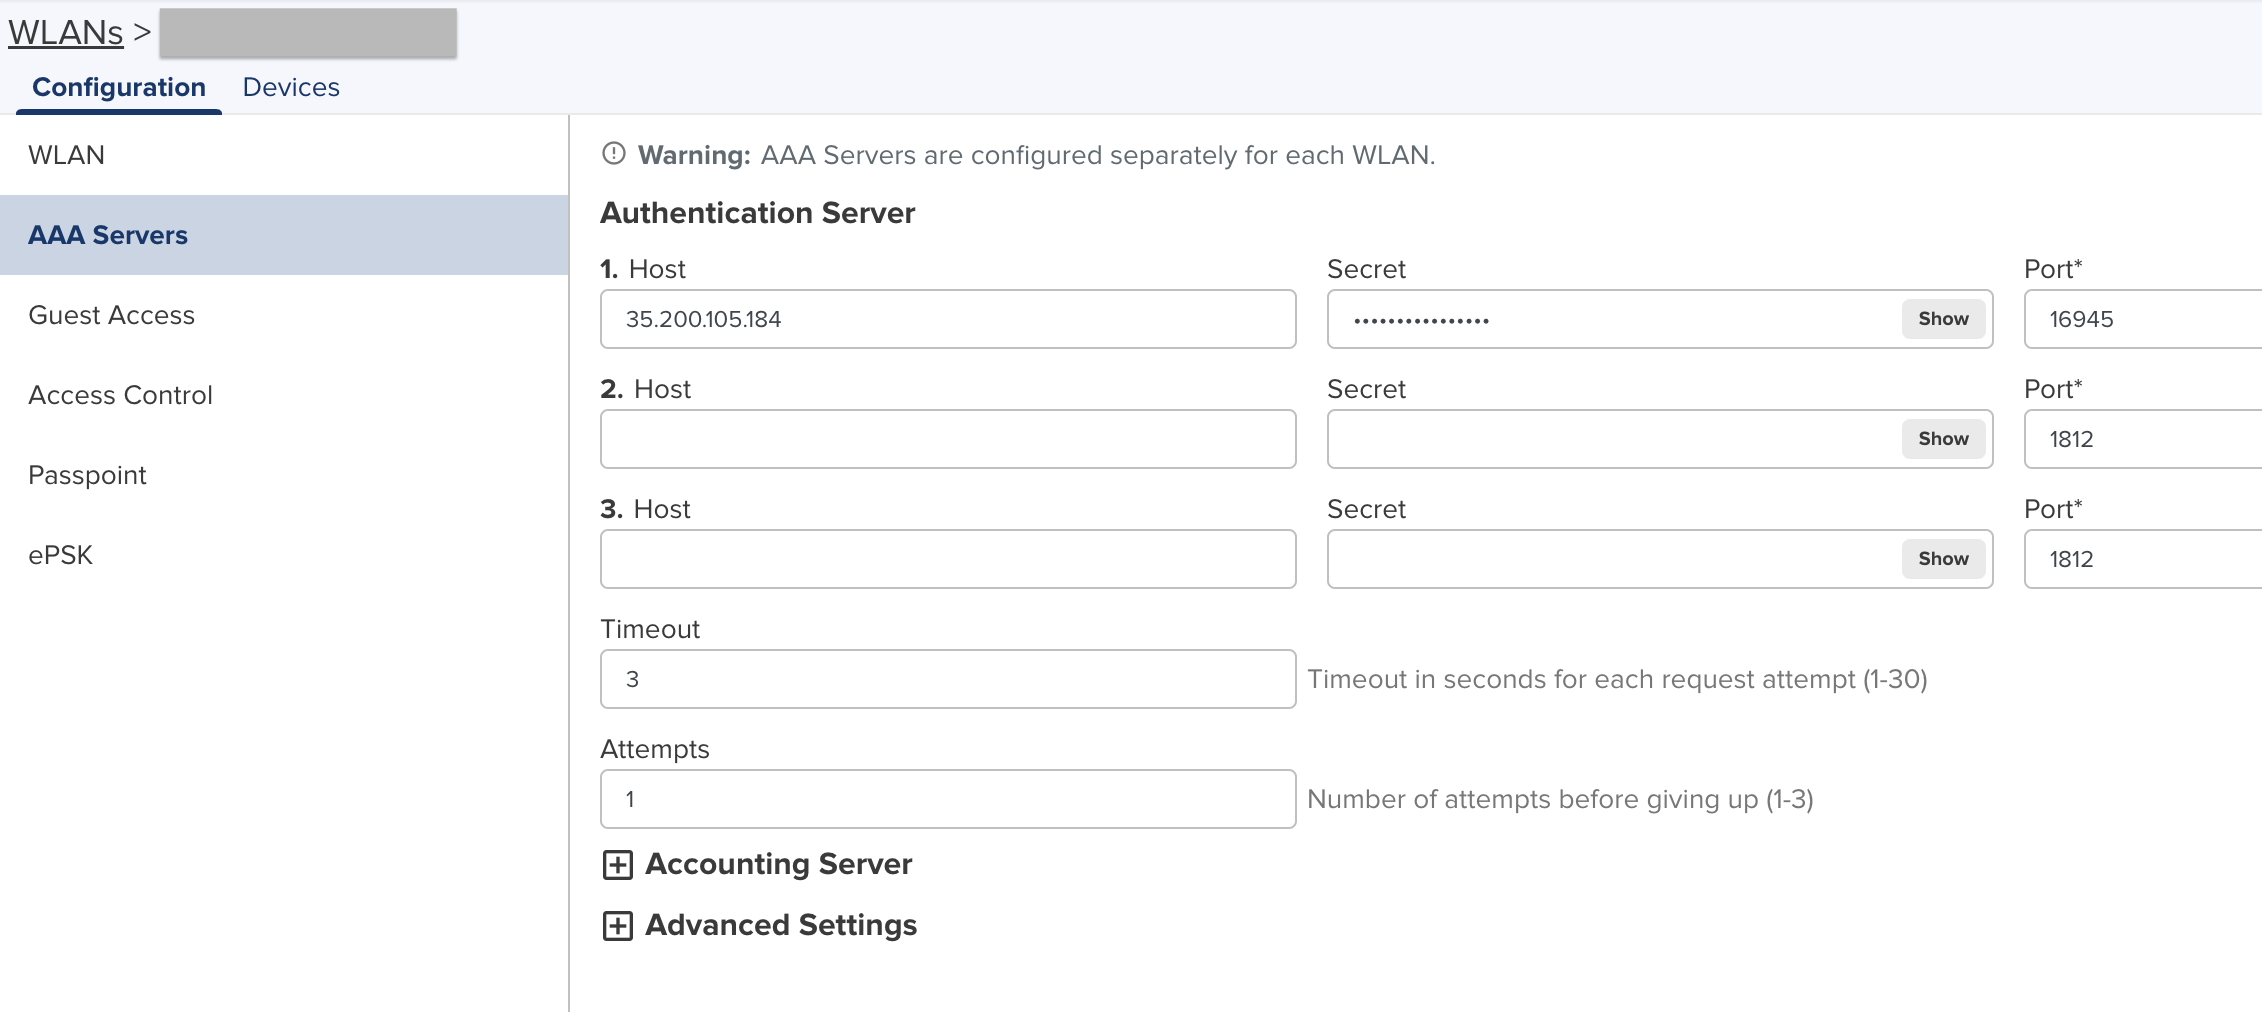
- Navigate to WLANs > Your WLAN > Configuration > AAA Servers and configure with the following values.
-
1. Host - * from the console
-
Secret - * from the console
-
Port - * from the console
-
2. Host - * from the console
-
Secret - * from the console
-
Port - * from the console
-
Timeout - 3
-
Attempts - 1
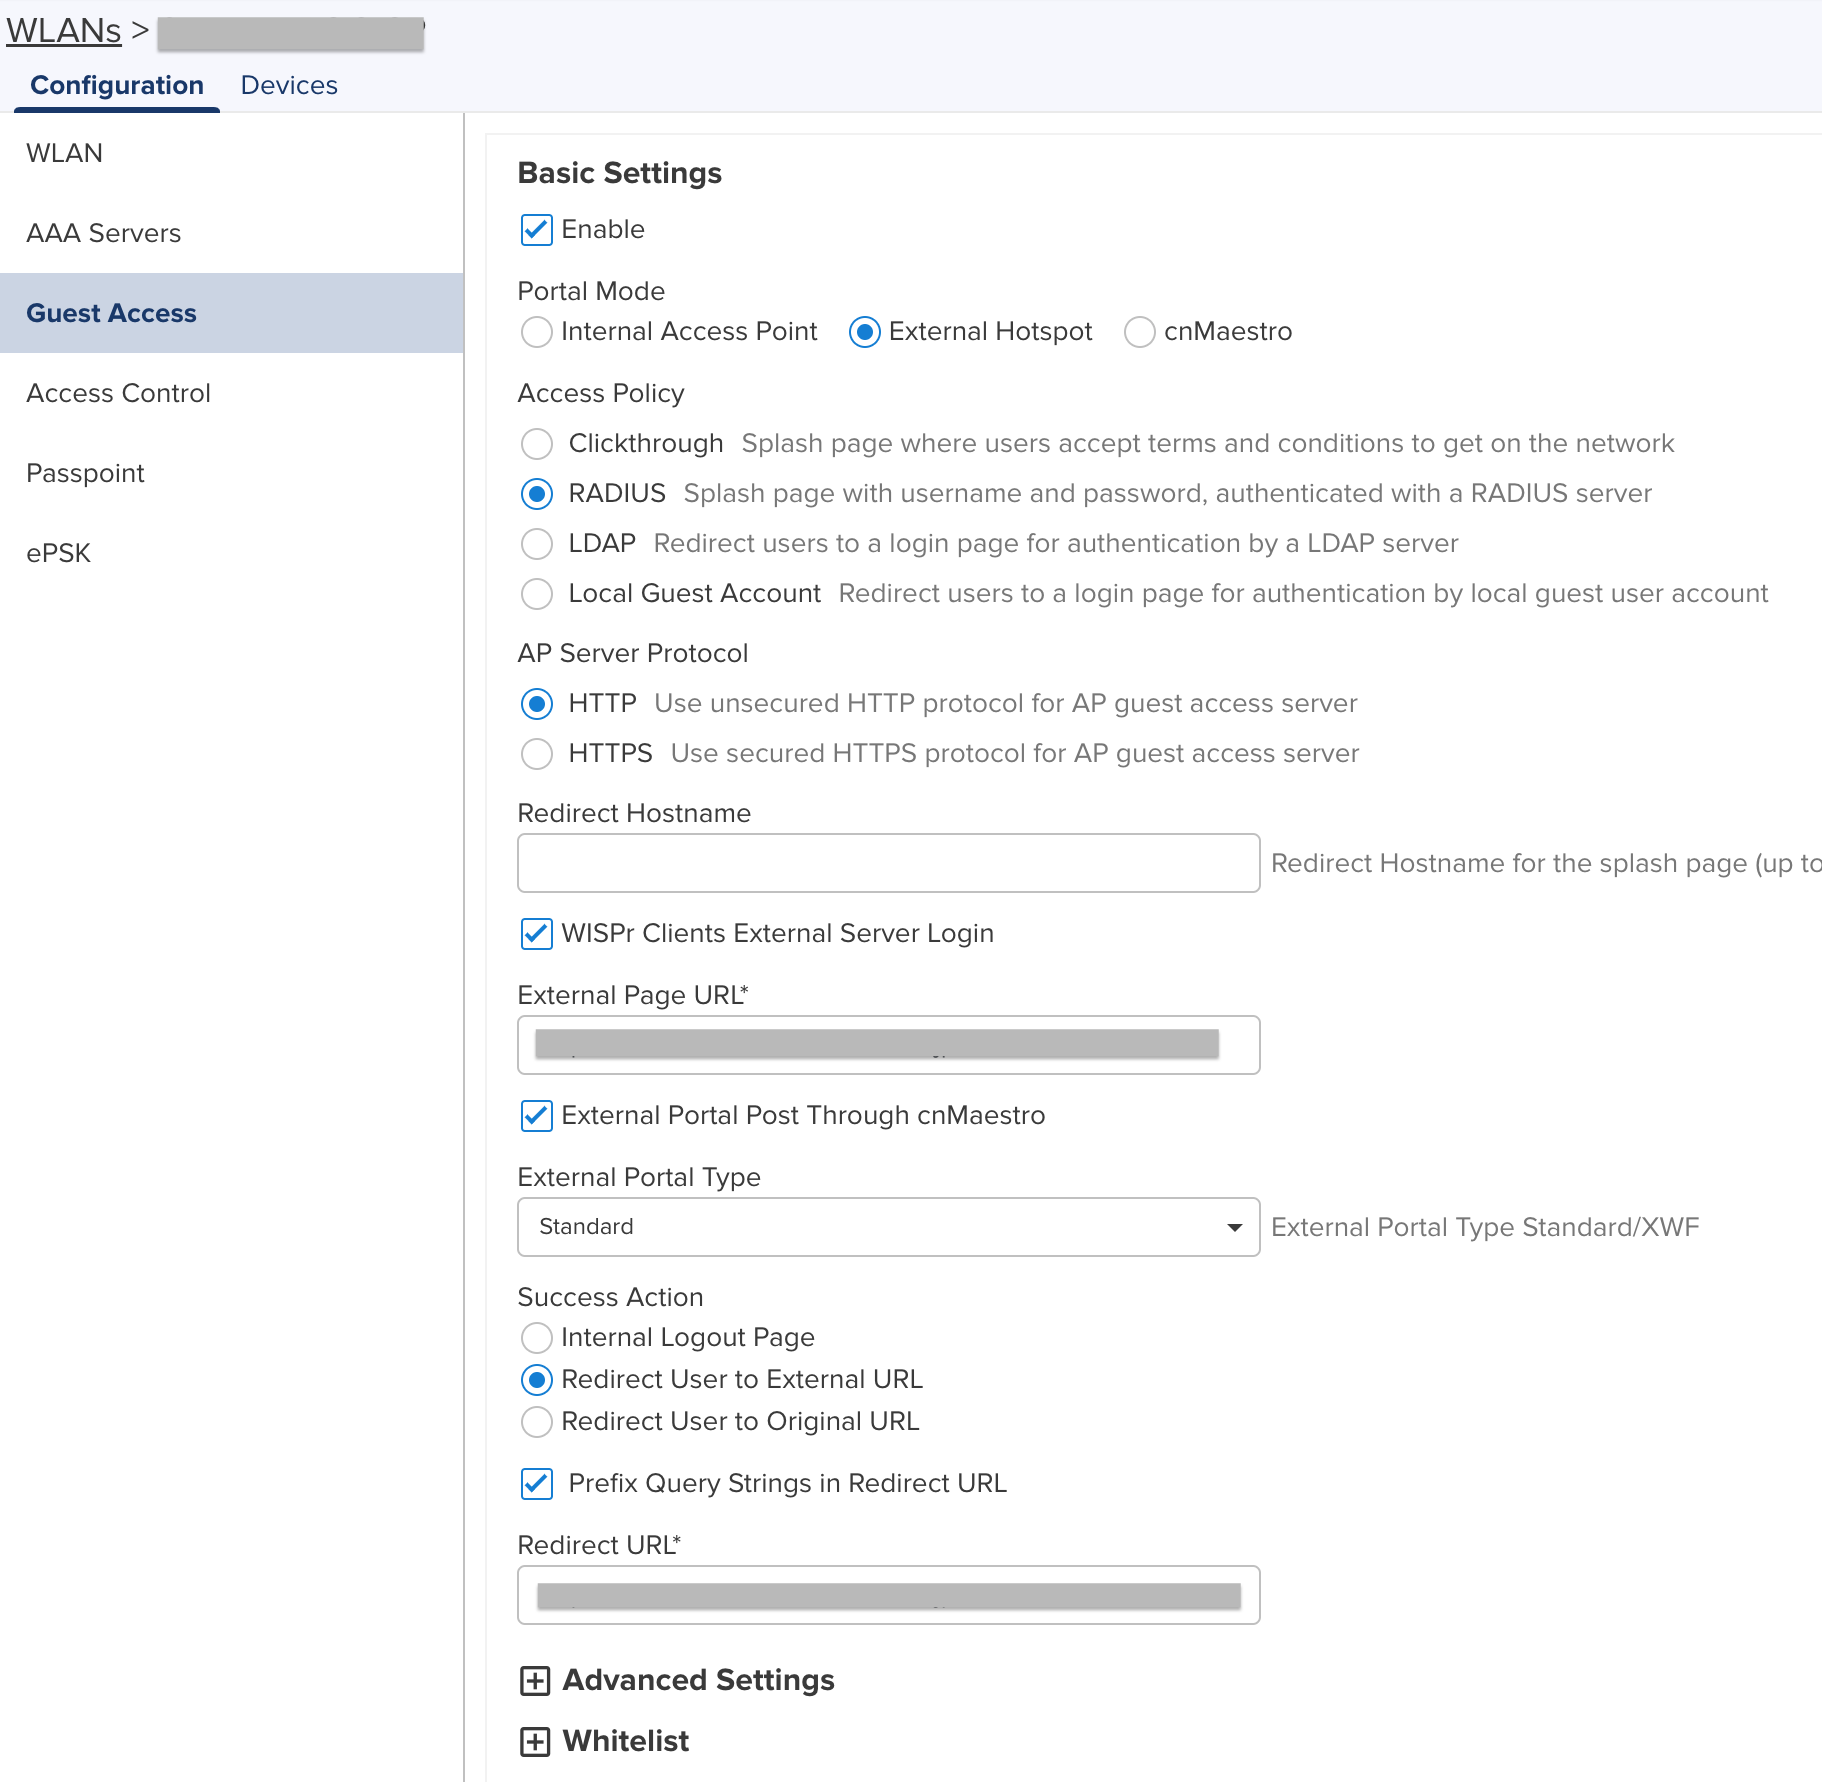
- Navigate to WLANs > Your WLAN > Configuration > Guest Access and configure with the following values.
- Guest Access - Enabled
- Portal Mode - External Hotspot
- Access Policy - RADIUS
- AP Server Protocol - HTTP
- Redirect Hostname - empty
- WISPr Clients External Server Login - Enabled
- External Page URL - * from the console
- External Portal Post Through cnMaestro - Enabled
- External Portal Type - Standard
- Success Action - Redirect User to External URL
- Prefix Query Strings in Redirect URL - Enabled
- Redirect URL - * from the console
DHCP Configuration
- Navigate to Monitor and Manage > Wi-Fi AP Groups > click on group > Configuration > Network > VLANs.
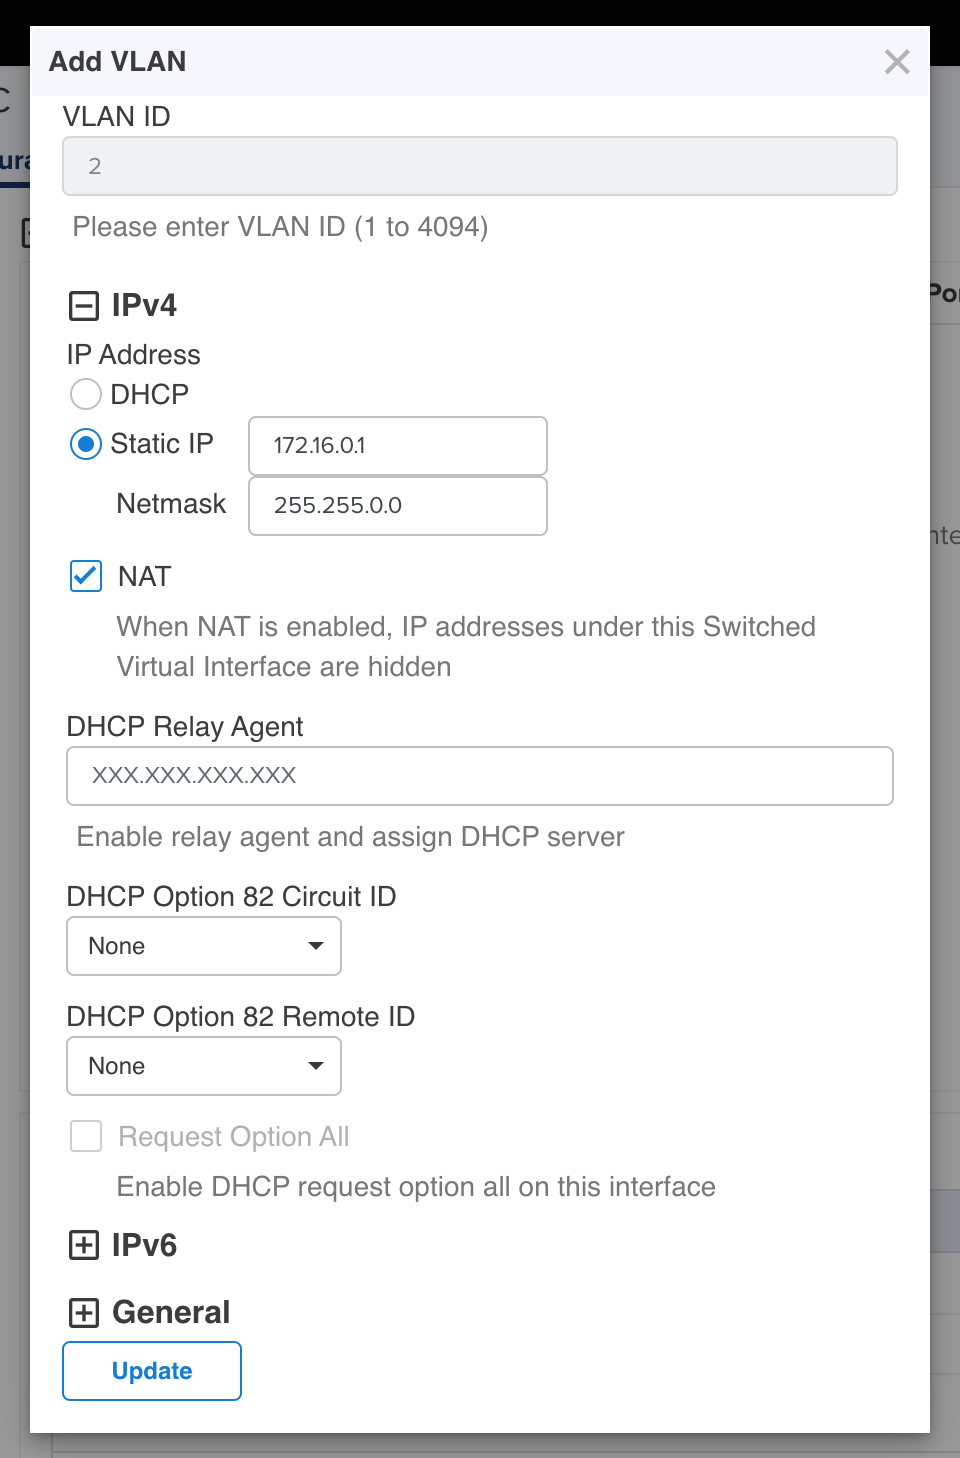
- Don't forget to assign the VLAN id to your WLAN at step N.2

Passpoint + OpenRoaming
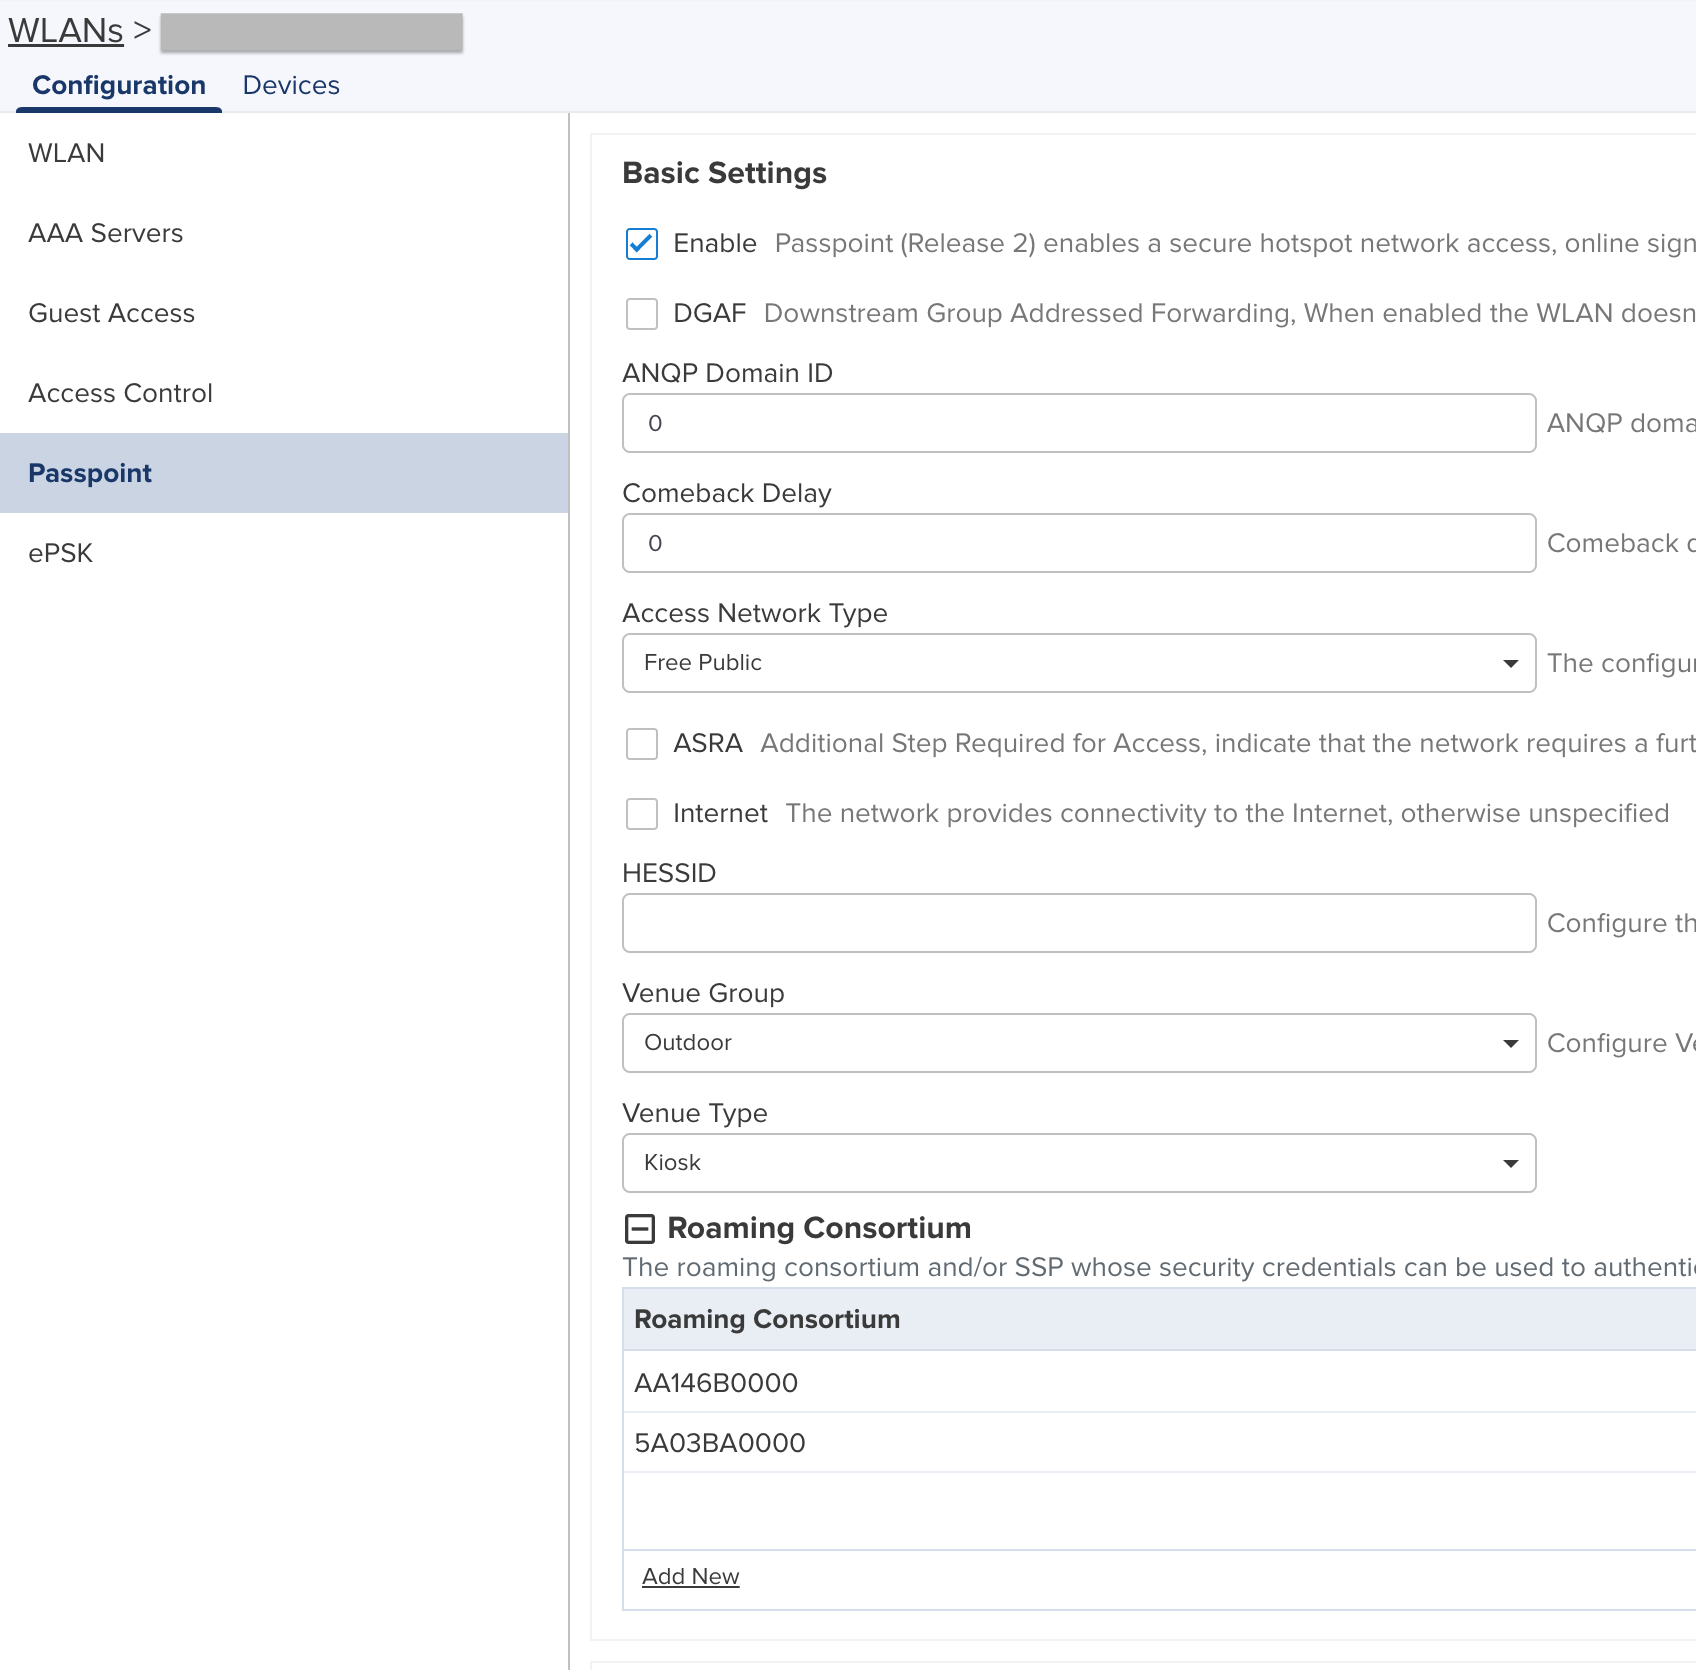
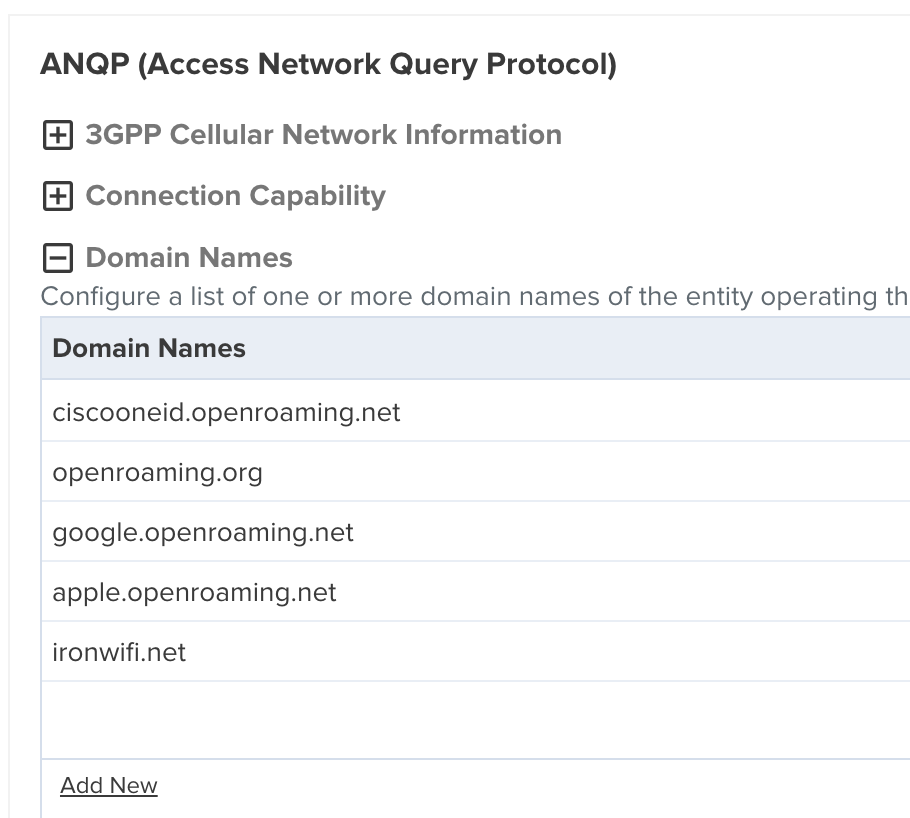

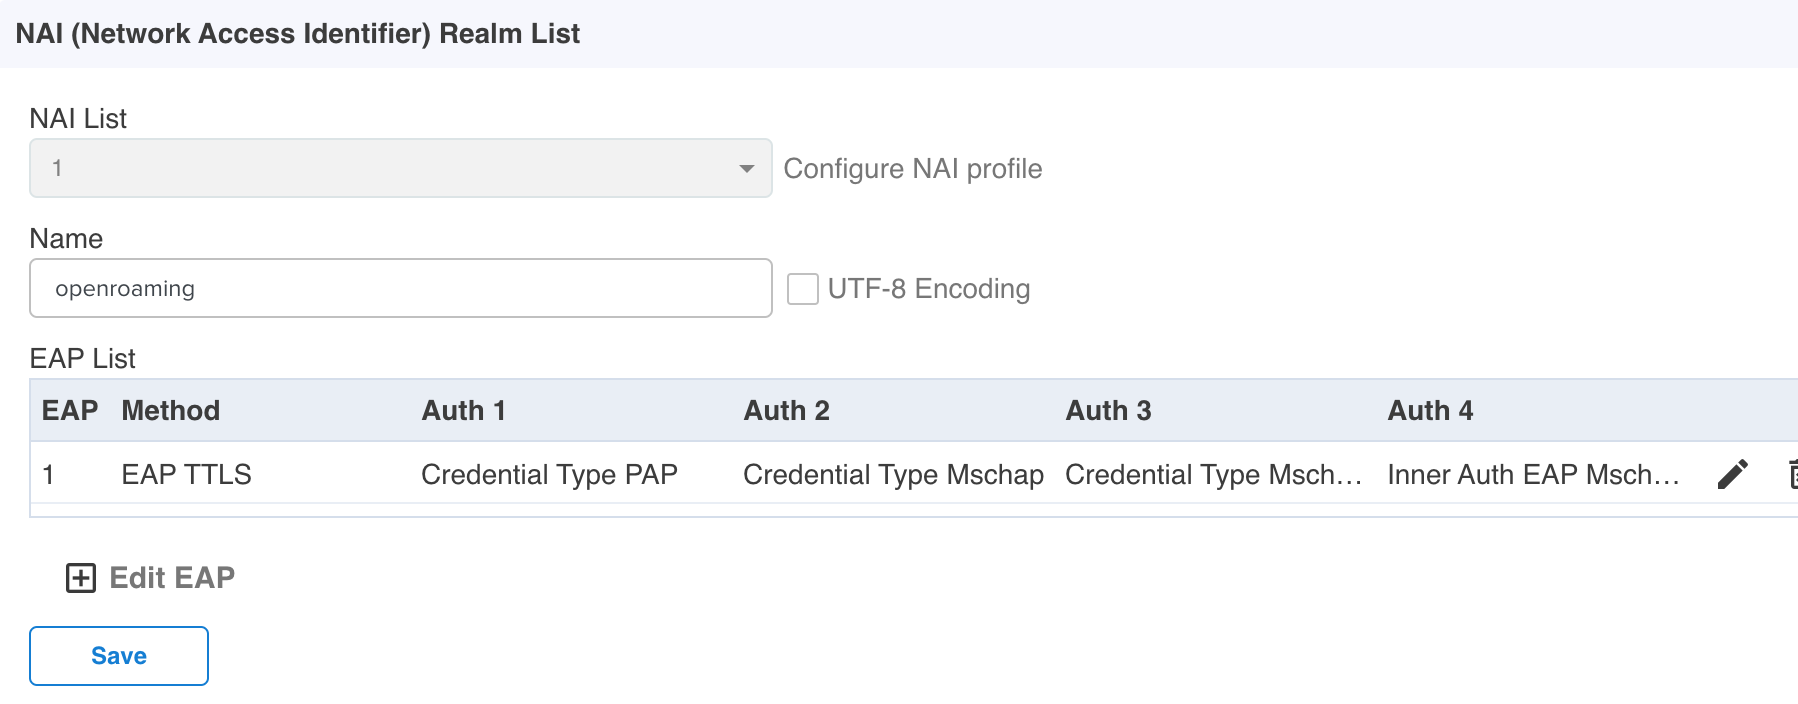
Screenshots
