Access Point Instructions for TP-Link EAP
This page explains the configuration of TP-Link wireless access points in standalone mode or managed by the EAP controller. We will configure the device to use an external Captive Portal and RADIUS server authentication.
IronWiFi Console Configuration
- Log into the IronWiFi console or register for free
- Create a new network
- After that, create a new captive portal, with vendor TP-Link EAP
Access Point Configuration
Before configuring the Captive Portal, please update your access points to the latest firmware and use the newest version of the TP-Link Controller software.
-
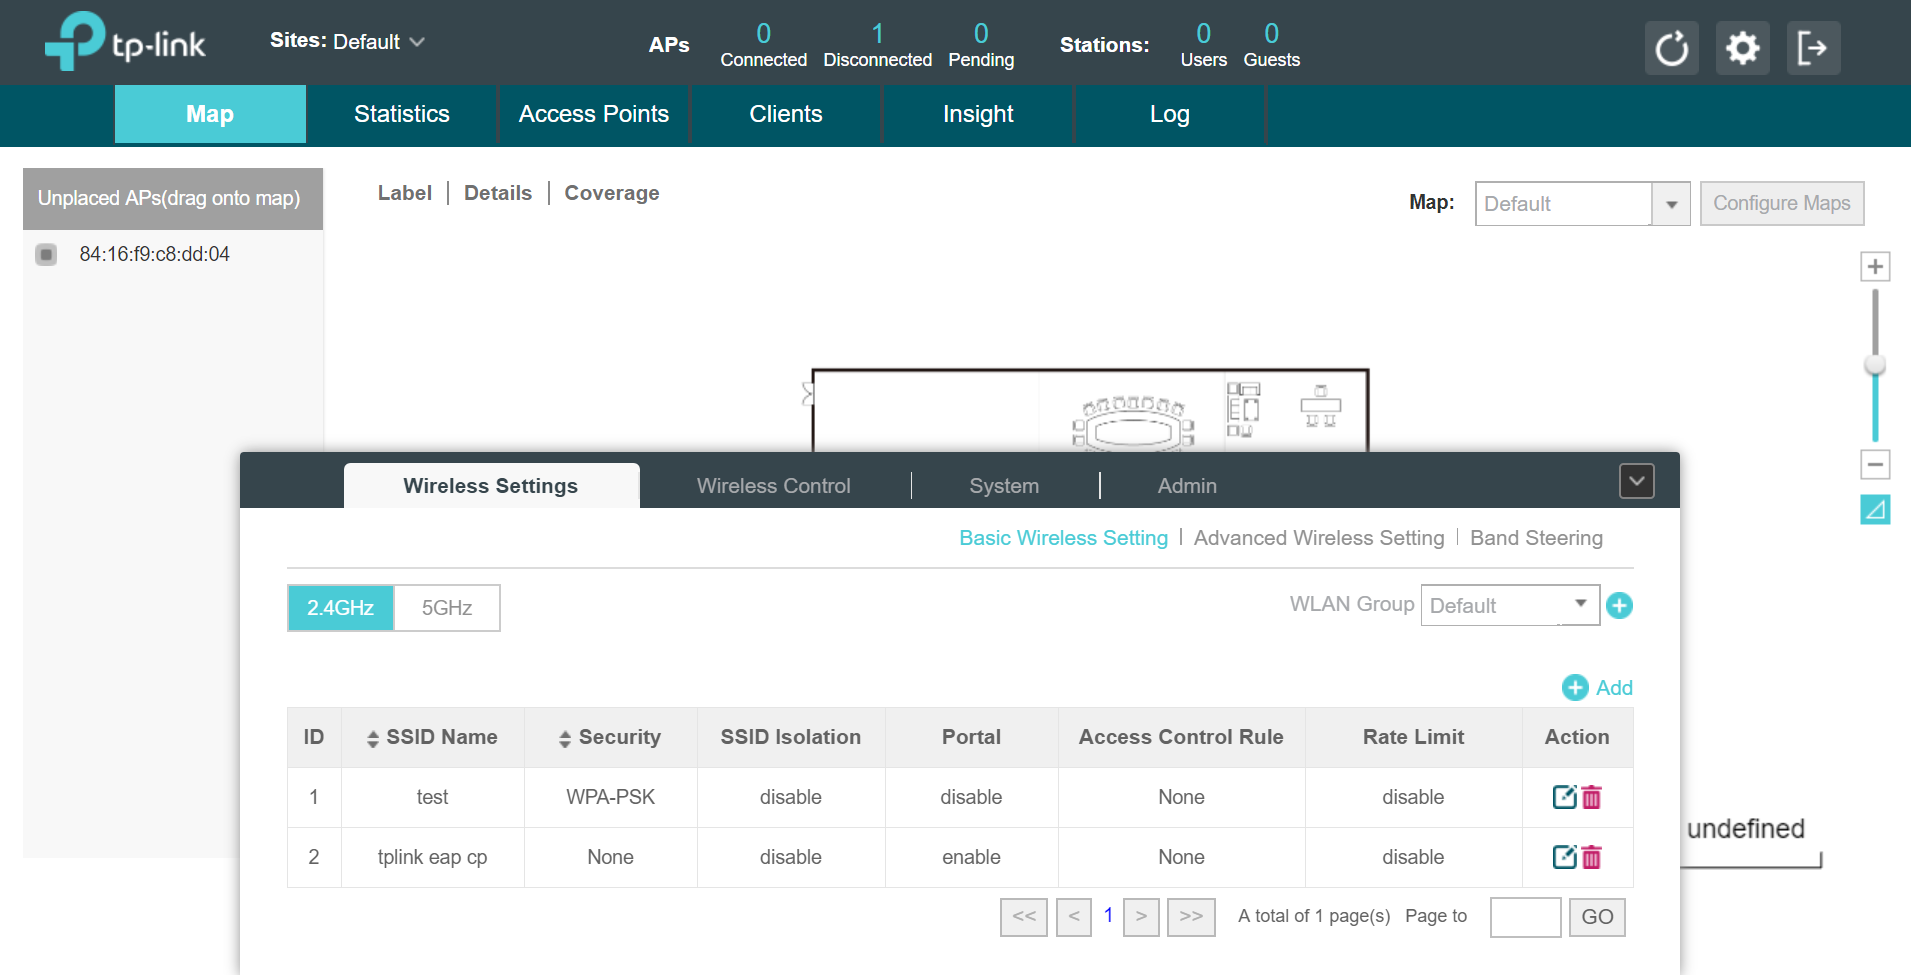
Sign-in to the EAP controller or directly to the AP settings. In Wireless Settings click on the Edit button next to the SSID you wish to use for Captive Portal - tplink eap cp in our example.
-
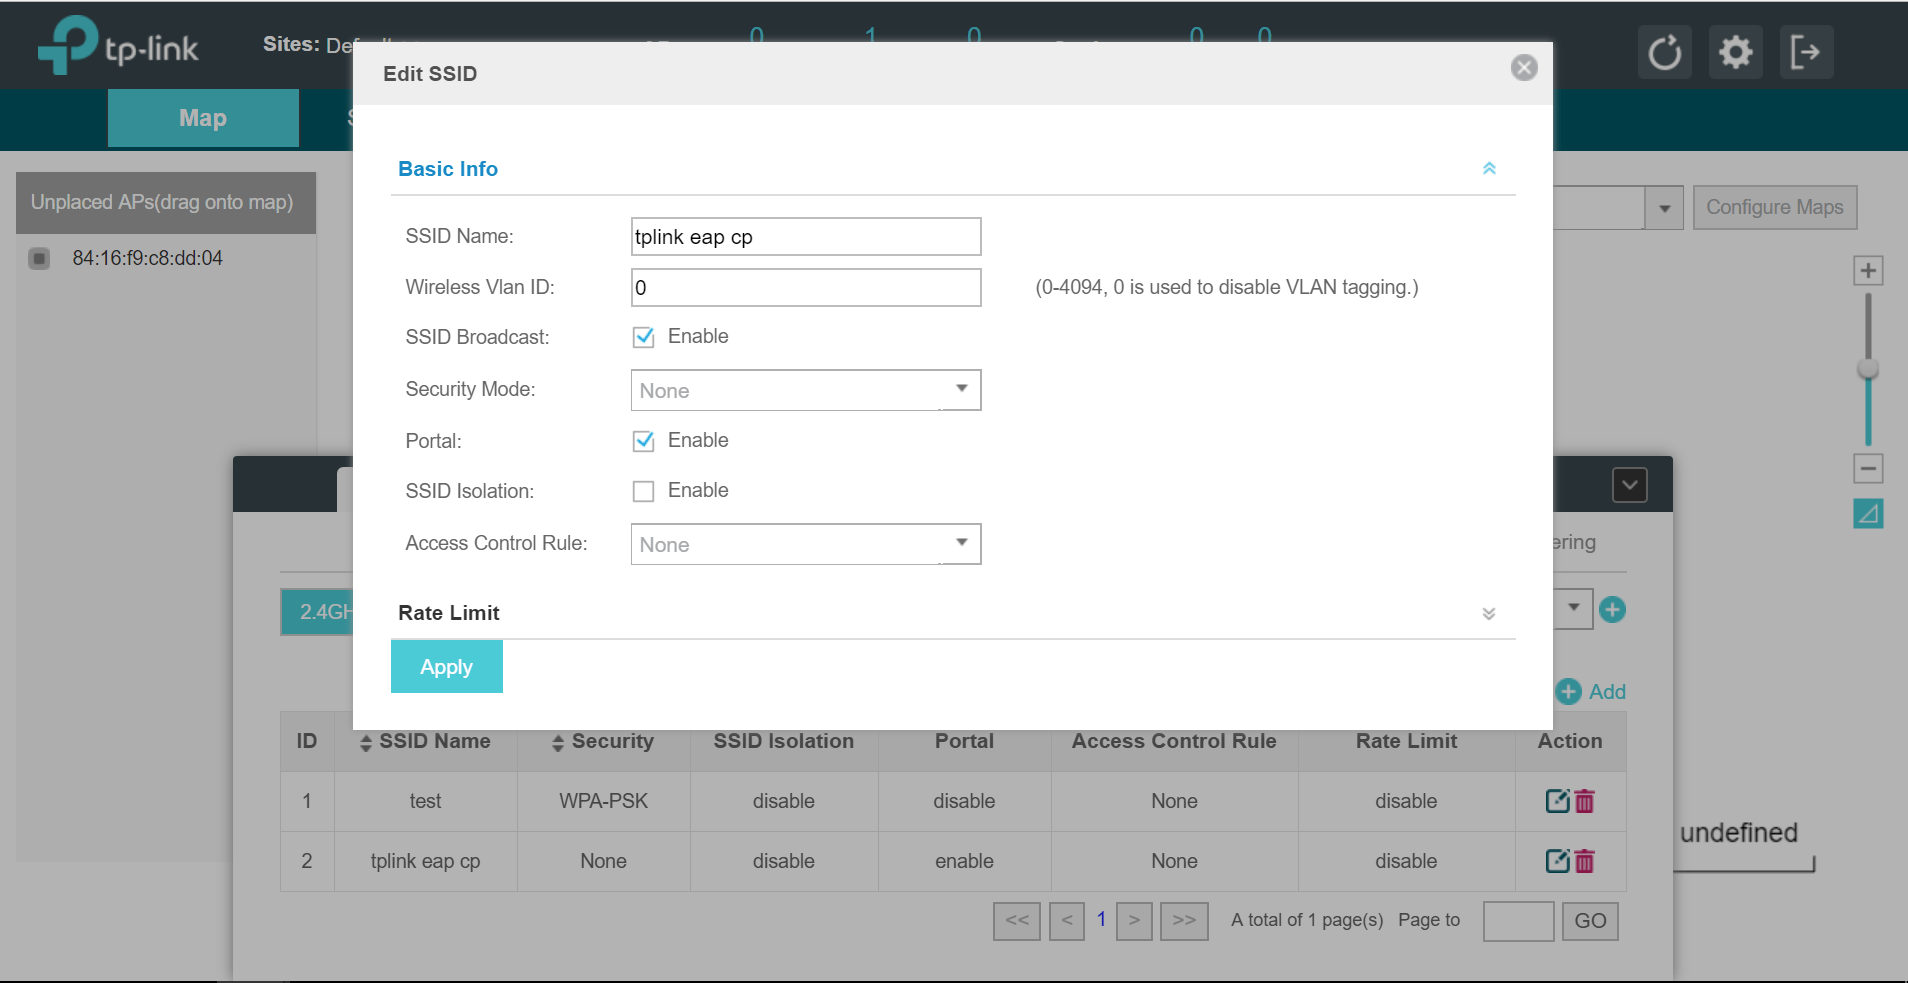
Under basic info, edit the configuration with:
- Security Mode - none
- Portal - enabled
Click Apply.
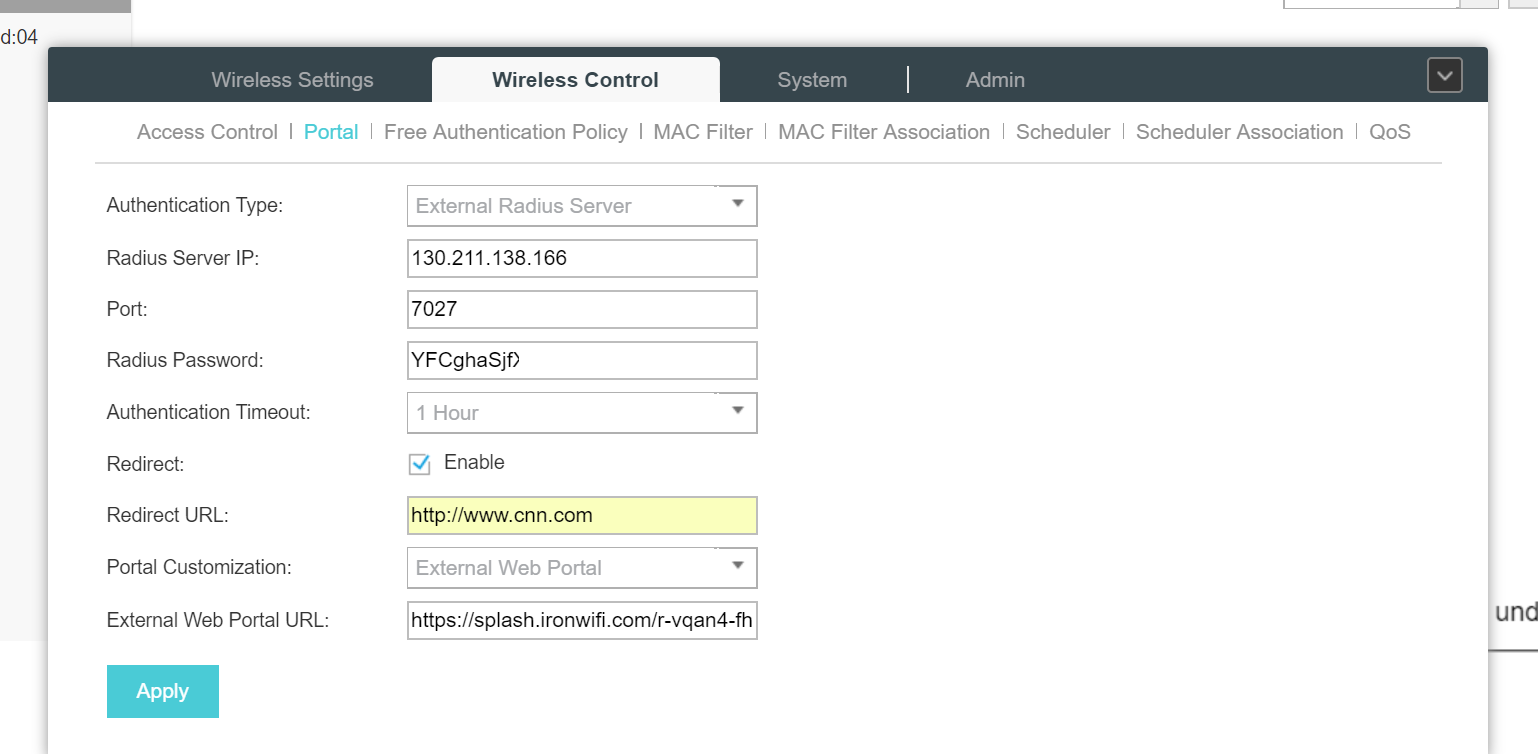
- Click on Wireless Control -> Portal and configure with:
- Authentication Type - External Radius Server
- Radius Server IP - get this value from the IronWiFi console
- Port - get this value from the IronWiFi console
- Radius Password - get this value from the IronWiFi console
- Redirect - Enabled
- Redirect URL - get this value from the IronWiFi console
- Portal Customization - External Web Portal
- External Web Portal URL - get this value from the IronWiFi console
Click Apply.
- Click on Free Authentication Policy and enter IronWifi load-balancer IP address which is 107.178.250.42/32
The configuration is now complete.
! You must also install a valid SSL certificate on your controller/AP, in order to avoid authentication issues !


